Why Ground Truth?
Ground truthing of geophysical survey results is essential to providing a more accurate depiction of the subsurface geology of a property. Whether one uses direct (e.g., drilling or excavations) or indirect (e.g., remote sensing and geophysical methods) methods, bedrock mapping presents a challenge. Without a doubt, confirming that the top of rock is not a block of stone or a boulder is essential. While hand digging, hand augering, test pitting, and non-core drilling methods are the most common and easiest method of soil sampling and approximating top of rock, coring with a diamond bit is the most accurate method of placing top of rock and determining the quality of results of a geophysical survey.
Ground Truthing Methods
There are several methods to ground truth a geophysical survey. Typically, the least expensive methods provide the least accurate results and are not worth the money. In order to acquire a more accurate geological model for a property’s subsurface study, ground truthing and fieldwork must be supervised by a geologist or someone specializing in geosciences. While more expensive, better methods require an experienced geologist, one who demonstrates a proficiency using several methods of testing for shallow bedrock.
Resolution vs Horizontal and Vertical accuracy
Ground truthing methods typically provide excellent detail at depth also called vertical resolution. However, these methods possess limited horizontally exploration unless one performs dozens or possibly hundreds of tests on a property, which results in a very high cost. Geophysical testing can provide good horizontal resolution but typically less vertical resolution. The combination of geophysical testing and ground truthing provides the most cost effective and accurate approach because one can cover a large amount of area horizontally and confirm results vertically.
Different approaches for ground truthing
Below is a list of different methods which are utilized to ground truth for shallow bedrock. They are placed in categories of low, medium, and high levels of confidence in the results. Each category includes a description and list of pros and cons for each method.
Low level of confidence – Hand tools or low powered options
The low level of confidence pertains to the inability to confirm that the bottom of the hole is not simply caused by a block of stone or a boulder. This approach is possibly useful in areas where bedrock is 4 ft in depth or less. The equipment is, more or less, available to the general public; however, the approach is physically demanding for the operator.
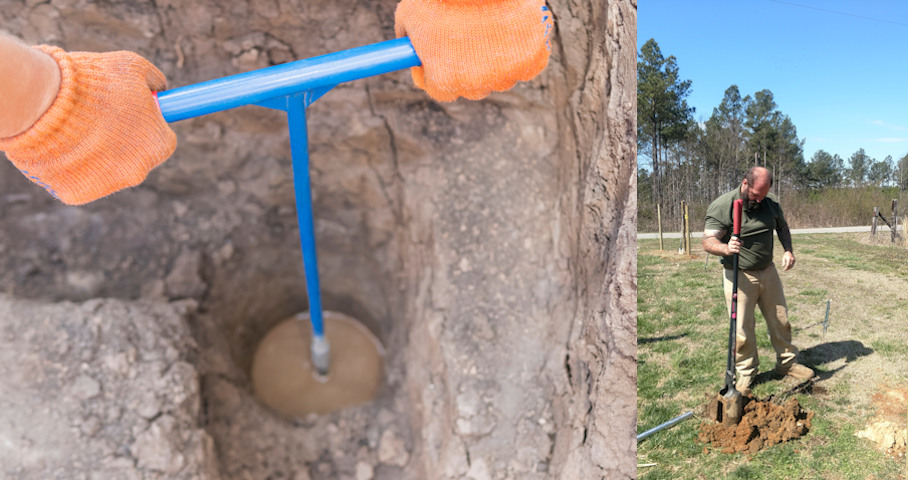
Hammering a rod into the ground
Method typically involves using a “T pin” or sledge hammer to pound a 4+ ft section of steel pipe, solid rod, or rebar into the ground.
Pros:
• The technique is inexpensive and very portable for difficult to reach areas.
• The surface disturbance is minimal; therefore, little to no back filling required.
Cons:
• The depth limitations are about 4 ft or less to rock.
• It is also labor intensive.
• This method is generally inaccurate because the user is uncertain if refusal is top of rock or gravel, and it does not provide a sample of the rock surface and bedrock materials to assure the top of rock. In addition, one may not retrieve the rod. Furthermore, overestimation of depth to bedrock occurs if the rod follows cracks or fractures within the rock unit.
Hand excavating shovels and post hole tools
Method involves using a shovel combined with a pickaxe to dig a small diameter pit.
Pros:
• The technique is inexpensive and very portable for difficult to reach areas.
• The surface disturbance is less than a backhoe and one can observe soil conditions.
Cons:
• The depth limitations are about 4 ft or less to rock.
• It is also labor intensive.
• The method is generally inaccurate (e.g., uncertain if refusal is top of rock or gravel), and it provides little or no sample of the rock surface and bedrock materials to assure top of rock.
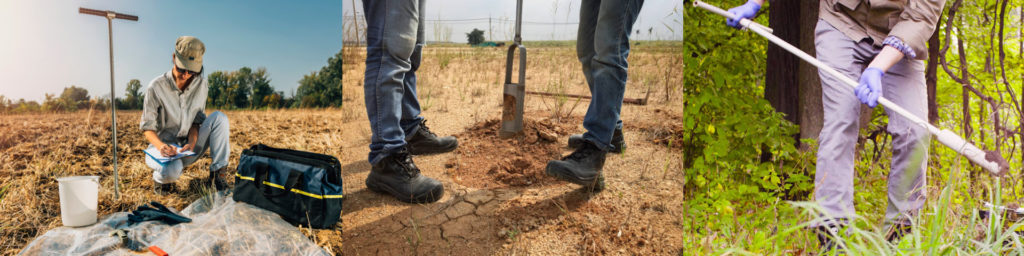
Examples of post hole diggers.
Portable soil sampler, hand augers, and power augers
Method involves the use of a soil sampler tube that augurs into the ground by hand.
Pros:
• The technique is inexpensive and very portable for difficult to reach areas.
• The surface disturbance is minimal; therefore, little to no back filling required.
• In good soil conditions, hand augers can reach twenty-five feet deep. Some power augers are even capable of drilling holes in rock.
Cons:
• When only basic equipment is available, the depth limitations are about 4 ft or less to rock.
• It can be labor intensive.
• The method is generally inaccurate (e.g., uncertain if refusal is top of rock or gravel) and provides little or no sample of the rock surface and bedrock materials to assure top of rock. Equipment is unlikely to provide reasonable results in areas with course grained materials.
Examples of soil sampling with hand augers.
Anticipated Degree of Confidence and Cost
The above four methods would have the lowest anticipated degree of confidence. Anticipated Costs: The cost of a day laborer(s) which would be about $100 to $200/day plus cost of tools.
Medium level of confidence – Excavating options
Excavating is possibly useful in areas where bedrock is 20 ft or less in depth. A medium level of confidence pertains to the inability to drill or bore several feet into the rock formation. The equipment below is less specialized than those used in higher level of confidence methods and is frequently available to more of the public. This approach is generally a one-man operation and does not require a water truck or other support vehicles. Given the operator uses powered equipment, there are less physical demands on the operator. However, excavations are large and more difficult to back fill.
Mini excavator
Method involves the digging of a small pit with a mini excavator.
Pros:
• The operator possesses greater power so samples of subsurface materials can be observed with little physical labor. The mini excavator provides more accurate results than low confidence methods since samples can be seen.
• Little physical labor is needed.
Cons:
• Depth limitations are limited to 10 ft or less to rock.
• Subsurface conditions may result in incomplete testing (i.e., inability to pass through coarse gravel).
• Finally, there is greater disturbance to the land surface and the pit must be back filled, resulting in a slower process.
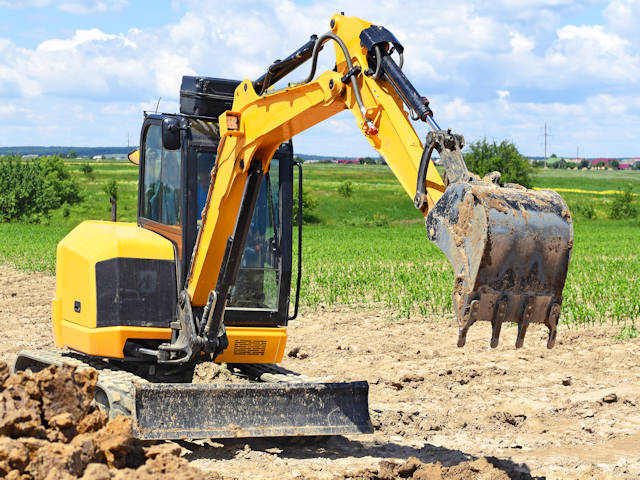
Miniexcavator for ground truthing.
Skid steer loaders or similar sized equipment with drilling capabilities
Method involves the digging of a small pit, augering, or rock drilling using appropriate tooling.
Pros:
• This method is more accurate and slightly more expensive than above methods.
• Samples of subsurface materials are often available.
• Little physical labor is needed.
Cons:
• Depth limitations are often 10 ft, or 10s of ft with good rock drilling accessories.
• Possibility of subsurface conditions resulting in incomplete testing (i.e., inability to pass through coarse gravel)
• Finally, there is greater disturbance to the land surface and the pit must be back filled, resulting in a slower process.
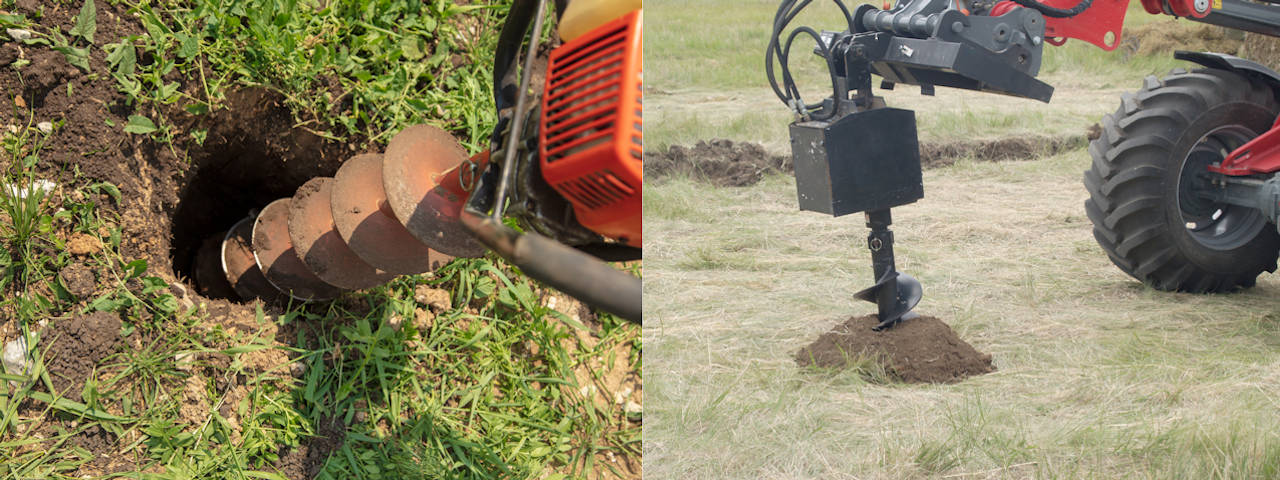
Examples of power augers.
Backhoe
Method involves digging a small pit or trench using a backhoe.
Pros:
• Greater size and power offers a greater accuracy than the low level of confidence methods.
• Little to no physical labor.
• Able to sample subsurface materials because equipment’s ability to dig deeper than 10 ft, resulting in less likelihood of incomplete testing (e.g., inability to pass through coarse gravel, blocks of stone, or boulders).
Cons:
• Depth limitations are less since larger backhoes can dig down 15 to 20 ft in depth.
• The associated cost will be higher.
• There will be greater disturbance to land surface and a slower testing process as the pit must be back filled.

Example of excavating with a backhoe.
Direct push methods
Method involves a specialized geotechnical piece of equipment that forces a rod into the ground, directly pushing it through unconsolidated formations. Geoprobe is an industry leader in this type of equipment.
Pros:
• Sampling process is quick with as many as 40 sampling locations per day depending upon field and weather conditions.
• Cost effective with little to no back filling.
• Also, few physical demands on the operator.
Cons:
• It can be prone to false positive indications when driven into a fracture or joint in bedrock.
• The geoprobe’s penetration is limited in semi-consolidated sediments and is not possible in consolidated formations. Additional costs occur if a rod breaks off when driven into a fracture.
• Finally, while soil samples are commonly available, samples of the rock are not.
Anticipated Degree of Confidence and Cost
Methods for medium levels of confidence are more accurate than the lower level of confidence methods. However, the costs involve more expensive equipment and require a greater level of experience to operate. With the exception of direct push methods, the cost approximately ranges from $500 to $1000 per day. Direct push methods such as a Geoprobe with an experienced operator range approximately between $1,500 to $2,500 a day.
Higher level of confidence – Augering/Drilling by professionals
Higher level of confidence approaches all involve commercial drilling. Sometimes the need to utilize more than one method per sampling location is necessary. Additionally, with these methods, there are no limitations regarding depth of sampling. A high level of confidence is assigned to this category since it has the ability to recover undisturbed soil samples and drill or bore into the rock formation. The equipment below is highly specialized and not available to the public; though, anyone can buy it. This approach generally requires more than a one-man operation and often requires a water truck and other support vehicles. Because the equipment is powered by a fairly large vehicle and is more robust, the tooling is often heavy and requires assistance. The drill holes are large enough that they require filling per agency standards.
Split spoon for soil analysis
This method requires the use of a truck-mounted, mechanized drill rig. A hollow stem augering system permits a hollow pipe stem, known as a spoon, to drive into the ground and take a 1.5 ft sample for every 5 ft that the hollow stem augers. This continues until encountering refusal. While continuous split spoon sampling is available, it is costly and time consuming.
Pros:
• Able to view samples of unconsolidated formations.
Cons:
• Subsurface conditions may result in incomplete testing (e.g., inability to pass through coarse gravel).
• This approach is unable to recover a bedrock sample.
• Wet and muddy field conditions require that the mounted, specialized drill rigs need transportation with balloon tires or track.
• Finally, the larger equipment may produce greater disturbances to the land surface.
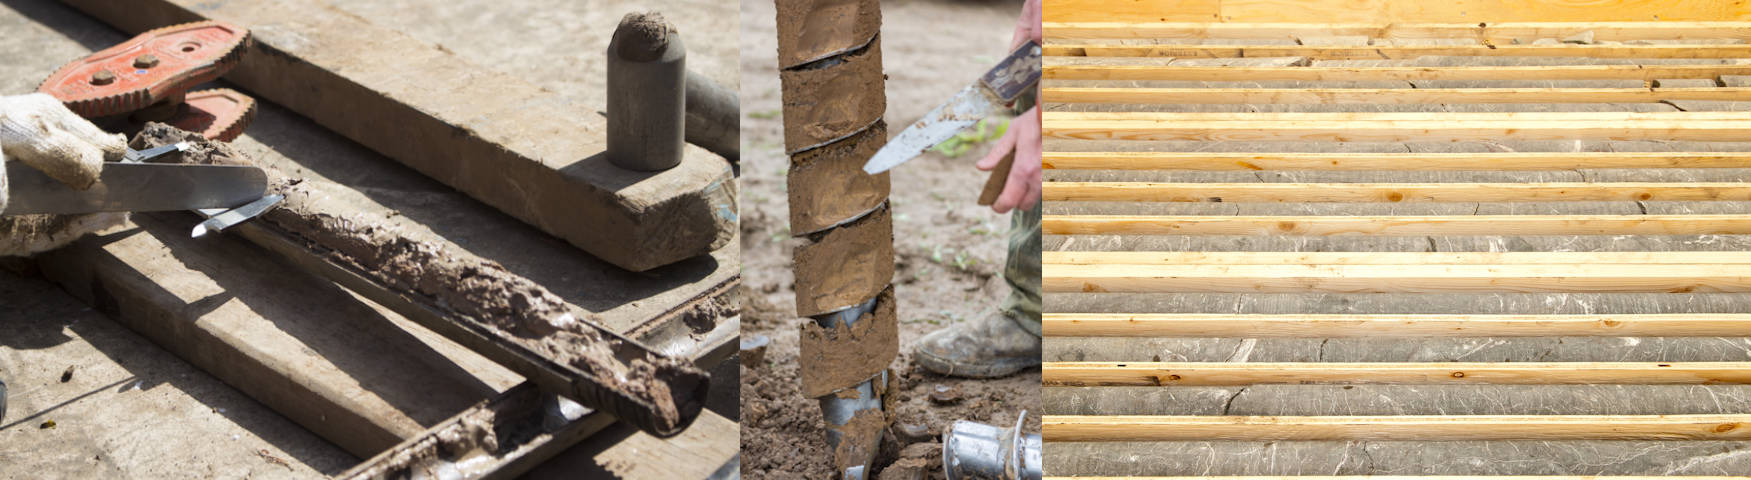
Example of split spoon samples, auger recovery, and rock core.
Auger Drill Rig
Method requires the use of a truck mounted mechanized drill rig.
Pros:
• With this method, an operator can use either straight flight augers, which usually recover unconsolidated sediment samples on the ground surface, or hollow stem augers. Unlike straight flight augers, a hollow stem auger acquires a sample in conjunction with split spooning (see above).
• These two augering techniques are often one of the least costly drilling methods.
Cons:
• Unfortunately, samples can be mixed with or contaminated by overlying formations.
• Often, augers cannot drill through coarse gravel and sometimes a sample is not recovered if the water table is shallow.
• Wet and muddy field conditions require that the mounted, specialized drill rigs need transportation with balloon tires or track.
• Finally, the larger equipment may produce greater disturbances to the land surface.
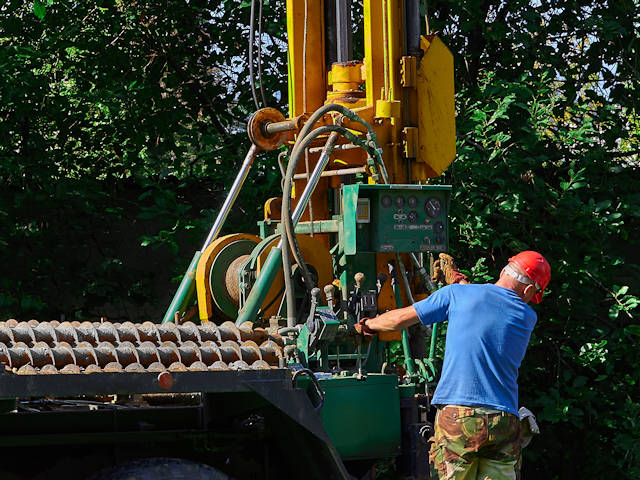
Auger type drill rig for mapping bedrock.
Mud rotary drilling without diamond drill coring
Method requires the use of a truck mounted mechanized drill rig.
Pros:
• Ability to drill and sample unconsolidated and consolidated formations.
• One of the least costly drilling methods.
Cons:
• Samples can at times be corrupted from overlying formations.
• Wet and muddy field conditions require that the mounted, specialized drill rigs need transportation with balloon tires or track.
• Finally, the larger equipment may produce greater disturbances to the land surface.
Air Rotary drilling without diamond drill coring
Method requires the use of a truck mounted mechanized drill rig with air compressor. Some rigs possess a dual wall capability to protect the sample integrity.
Pros:
• Ability to drill and sample unconsolidated and consolidated formations.
Cons:
• Possibility that sample retrieval lost in fractures and joints.
• This drill equipment is often very heavy and cumbersome. Therefore, it is not ideal for transport in poor field conditions.
• Wet and muddy field conditions require that the mounted, specialized drill rigs need transportation with balloon tires or track.
• Finally, the larger equipment may produce greater disturbances to the land surface.
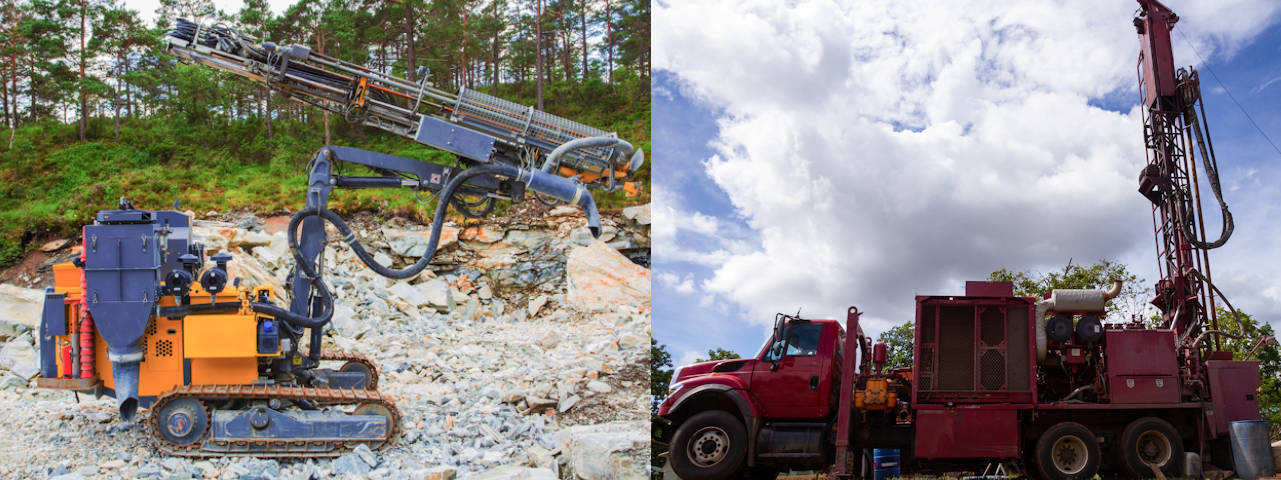
Examples of drill rigs.
Diamond Drill Coring
Method requires the use of a truck mounted mechanized drill rig. Typically, augering, mud rotary drilling, or air rotary drilling is utilized to drill through the unconsolidated formations and is switched over to the coring process when the point of refusal is encountered. A hollow 5 ft or 10 ft core barrel with an attached diamond drill bit is a required tool for coring. The drill casing is placed in the unconsolidated formations before coring commences to prevent fallback that corrupts the sample. The most popular core diameter size is typically 1.875 inches (NQ) but core sizes up to 6 inches in diameter are available (the wider the diameter the higher the cost). NQ size is the most cost effective and the most common in use by the drilling industry.
Pros:
• Drill core provides a very accurate sample of the rock unit.
Cons:
• Boring equipment is often very heavy and cumbersome. Again, it is not ideal for transport in poor field conditions.
• Wet and muddy field conditions require that the mounted, specialized drill rigs need transportation with balloon tires or track.
• Finally, the larger equipment may produce greater disturbances to the land surface.
Sonic Drilling
Method requires the use of a truck mounted mechanized drill rig. It is one of the newest drill technologies for drilling unconsolidated formations.
Pros:
• Sonic drilling provides the most accurate samples in unconsolidated formations.
• It is useful in recovering samples in soft and hard sections of a formation.
Cons:
• This is the most expensive drilling method available. Frequently, charging upwards of $50 per ft, depending on hole diameter.
• Wet and muddy field conditions require that the mounted, specialized drill rigs need transportation with balloon tires or track.
• Finally, the larger equipment may produce greater disturbances to the land surface.
Anticipated degree of confidence and cost
The higher level of confidence methods provide the most accurate ground truthing methods for delineating the bedrock surface. While poor sample recovery occurs with any drilling method, subsurface conditions (e.g. fractured bedrock, very coarse gravel, inordinate ground water movement) commonly dictate difficulty in acquiring a good sample. Drilling costs are usually estimated by the foot along with hourly charges such as moving from hole to hole, casing the hole, and plugging a hole. But for several shallow borings of 1 to 20 ft. in depth, it appears that the most cost effective approach is to receive quotes on a daily rate. Contractors provide rates depending upon the drilling method, crew size, equipment’s off-road capabilities, site conditions, and location. Some informal research shows some contractors may not bill on a daily rate. When available, drilling company daily rates probably range from $2,500 to $5,000 per day.
Author’s Comments and Recommendations
There are several field methods available as seen above to check results generated from geophysical testing when mapping bedrock. The discussion below is based on the author’s 43 years of experience as a geologist, who has worked for three Fortune 500 companies in the mining and excavation industries.
The author, Alan Shapiro, started as a geologist in 1976, and specialized in locating and characterizing Silurian bedrock conditions in Wisconsin and the Midwest USA for the past 28 years (since 1991.) His experience in conducting and managing domestic and international geological drilling projects has provided him insight as to some of the most cost effective means for bedrock surface mapping.
Today, the preferred method, although not the least expensive method, of ground truthing a geophysical survey that the author recommends is boring with a multi-dimensional or geotechnical drill rig (augering, mud rotary, diamond drill coring). A crew frequently consists of a drilling contractor with two men and a geologist to log the samples. In the author’s case, the geologist writes up a report of verification on the findings.
Personal approach
Following is a brief outline of how the author recommends conducting the ground truthing.
Pre-drill research
The geologist reviews available published geological related information for the property of interest and discusses the geophysical survey results with the field geophysicist. Depending on availability, the resources may include U.S. Geological Survey data, Wisconsin geological survey data, DATCP (Wisconsin Department of Agriculture, Trade and Consumer Protection), NRCS (Natural Resources Conservation Service), local maps, satellite imagery, and other available resources.
Drill hole layout
The geologist establishes a drill hole layout based on information ascertained from the research such as interpreted depth to bedrock, paleokarst features, or other geological structures delineated by the geophysical survey. The program also takes into account: property size, topography, buildings, location of roadways, right-of-ways, the locations of public and private utilities, and the placement of rail lines, waterways, and/or other safety or environmental concerns. Other factors may include unexpected access issues or agency requirements on the specific placements, spacing, and depths of drill holes.
Mapping
The report includes a map depicting the property of interest and drill hole layout using latitude and longitude coordinates for each boring location. The hole locations are established in the field using these coordinates and surveyed by consumer or sub-meter GPS.
Drill hole optimization
Sometimes, drill holes can be eliminated or, at times, additional holes may be required depending on the simplicity or complexity of the geology.
Drill specifications and approach
Common pertinent requirements of the drill equipment:
• Drill outfitted on a lightweight all terrain type vehicle. Often the vehicle needs balloon tires or tracks because of terrain.
• Requires a variable drill. It will likely need to switch from augering to mud rotary to core drilling while set up on the same hole. For example, either an ATV CME 50 or a Diedrich D-120 drill would have these capabilities.
• It is preferable to have a 500 to 750 gallon water tank attached to the drill as opposed to having a separate water truck vehicle for the project.
• In addition, the geologist and the driller’s helpers often require one ATV to access the property.
Drilling methodology
Recommendations for the driller contractor:
1. Initial drilling: either rock bit with a 3.875 inch tricone bit or straight flight auger through the soil and unconsolidated sediment until the crew encounters the point of refusal, which should be the top of the Silurian dolomite.
2. Ream and place in the hole 4 inch HW casing, attempting to seat it in fresh, unfractured bedrock.
3. Switch over to core drilling; trip out the rotary rods and replace with core rods and drill a 2.98 inch hole and generate a 1.875 inch core using a NQ size bit. Drill at least 3 feet into fresh rock. This confirms that refusal is not from a block of stone or boulder.
4. Remove all rods and casing and plug the hole up using a bentonite grout approved by the DNR.
Anticipated Costs
• Some informal estimates from local contractors indicate the cost for a drilling contractor will be $2,800 to $3,200 per day plus a one time mobilization/demobilization fee for the drill period. This cost can vary depending on the distance from contractor’s base of operations.
• The supervising geologist will maintain a written record of the boring description, called the drill log, and issue a short report regarding the drill results. An experienced geologist typically charges $800 to $1200 per day.
Disclaimer
The above information has not been presented to any government agencies to solicit their feedback regarding suggestions or recommendations. These agencies are currently evaluating acceptable ground truthing methods, and we look forward to having an opportunity to review their input. Finally, the opinions and discussions stated above are based on the author’s years of experience as a geologist.

Glossary of Definitions and Terms for Mapping Bedrock

How much land is needed for a livestock nutrient management program?

What areas benefit the most from an infield bedrock verification survey?

Summary of the HYDROGEOLOGICAL CHARACTERIZATION OF THE TOWN OF LINCOLN, KEWAUNEE COUNTY, WISCONSIN

What is top of bedrock?

Geology, Groundwater, Geophysics, and WI DNR NR 151 Runoff Management Standards

A History of Groundwater Protection Past Present and Future

References and links for agricultural professionals, farmers, engineers, geologists, geophysicists,…